
A GOOD BEGINNING: HOW TO START WITH WATER KEFIR
Water kefir is a delicious, homemade, and healthy fermented soft drink. The process of making it yourself is often described as mind-bogglingly easy, tingly fresh, incredibly delicious, and very satisfying.
However, let’s be honest: when you first open that package and stare at a cluster of strange, translucent grains, it can be hard to believe they will ever become a delicious drink. And since it’s a living, fermented product full of microbes, a few questions naturally pop up: Is it actually alive? How does this whole process work? And am I doing it right?
Don’t worry. This guide is designed to get you through that initial phase of uncertainty and set you up for success. We’ll walk you through the first steps to ensure your water kefir journey starts off on the right foot, turning those mysterious grains into a wonderfully fizzy drink.

Where to find waterkefir grains
Water kefir grains are living cultures, so you can’t just find them in a regular supermarket aisle. Luckily, there are a few common ways to get your hands on them and start your fermentation journey.
Traditionally, kefir grains are shared. Since healthy grains grow and multiply with each batch, people who regularly make water kefir often have an excess to give away to friends, family, or neighbours. This is a wonderful way to join the fermentation community.
The most common and reliable method today is to purchase them online from a reputable supplier. This ensures you get a healthy, verified culture to start with.
HOW TO START WITH WATER KEFIR
If you receive fresh water kefir grains, start using them as soon as you receive them. If you wait, you run the risk that the kefir will not start up properly or not at all. The grains are a living ecosystem, a SCOBY (Symbiotic Culture Of Bacteria and Yeasts), and they need food to stay active. In any case, it will take longer for it to regain its full strength. If you really must, refrigerate the kefir for as short a time as possible.
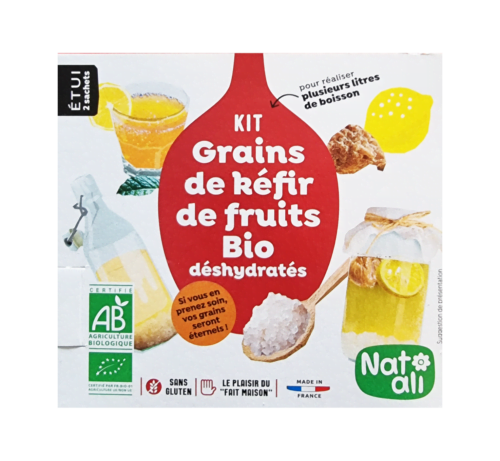
Can you use DRIED WATER KEFIR GRAINS

Fresh and dried water kefir grains are exactly the same. The dried ones just need a few days to rehydrate. On the other hand, buying dried water firk grains has many advantages:
- Easy to ship/carry, even abroad.
- Does not deteriorate in transit.
- Light weight (shipping cost).
- You can purchase them already, even if you don’t plan to make water kefir immediately that week.
- After activation, the taste of our water kefir is identical to that of fresh grains.
When using dried kefir grains, after rehydrating, they need time to adjust and mature before they will begin to grow. This adjustment period is normal and may vary widely in length from a few days to a few weeks. In most cases, at around 4 days—which coincides with your 2nd water kefir-making cycle—the kefir is at about 60 to 80% of its original activity. This will grow to 100% over the course of 1 or 2 weeks. You can overcome this by adjusting the proportions a bit, so a bit more grains relative to the water used.
INGREDIENTS
So, you’ve got your grains. What else do you need?
CORE INGREDIENTS
OPTIONAL ADDITIONS

TOOLS you need FOR MAKING WATER KEFIR
The great thing about water kefir is that you don’t need a lab full of specialized equipment. You probably have most of what you need in your kitchen already. However, choosing the right materials is key to keeping your kefir grains happy and healthy for years to come.
A Glass Jar: A large glass jar (at least 1-2 liters) is the perfect vessel for your first fermentation. Glass is non-reactive and allows you to easily observe the fermentation process.
A Breathable Cover: You need to cover the jar to keep out dust and insects while still allowing fermentation gases to escape. A coffee filter, a piece of cheesecloth, or a clean tea towel secured with a rubber band works perfectly.
A Sieve: This is crucial. A fine-mesh plastic or nylon sieve is needed to separate the kefir grains from the finished liquid. Use plastic or stainless steel.
A Spoon: For stirring the sugar into the water, use a wooden, plastic or stainless steel spoon.
Pressure-Safe Bottles: For the second fermentation (F2), where you build carbonation, you absolutely must use bottles designed to hold pressure. Glass swing-top (Grolsch-style) bottles or sturdy plastic soda bottles are ideal. Do not use regular decorative glass bottles or square bottles, as they can explode under pressure.
TIMING AND TEMPERATURE of making waterkefir
Let’s go!
First fermentation (F1)
Water kefir will ferment in 24-48 hours. If you are lucky and your grains are very active, this may happen in 24 hours, but usually, 2 days is the average. For best results, prepare kefir at room temperature (20-24°C / 68-75°F). If it’s colder, the process will be slower.
Second fermentation (F2)
After the first 48 hours, your water kefir is ready to drink. However, many opt for a second fermentation to build carbonation and add extra flavor. This usually takes 12-24 hours. For this, the kefir (without the grains) is bottled in a sealed, pressure-safe bottle, often with additional flavorings like fruit or ginger. Beware: the bottle must be able to handle pressure (e.g., a swing-top bottle or a PET bottle) to prevent explosions! Leave the bottle completely sealed during F2 to build up pressure.


What kind of fruit can I use in water kefir?
Water kefir offers the opportunity to experiment with various types of fruit for a range of flavors. Citrus fruits like lemon, orange, and lime are popular choices, as are dried fruits like raisins and figs.
Fruit during the second fermentation
The second fermentation (F2) takes place when the water kefir is in a pressure-safe bottle. This is a great time to add extra flavorings to give your water kefir a unique taste. Fruits like strawberries, blueberries, and raspberries are a delicious addition to water kefir. Adding fresh fruit during the fermentation process can result in a deliciously flavored beverage packed with extra nutrients. What does water kefir taste like? It depends on the fruit you use!
TROUBLESHOOTING & TIPS
SIGNS OF HEALTHY KEFIR
COMMON ISSUES
Is water kefir healthy?
Here we answer some questions about the health benefits of drinking water kefir
CONCLUSION
And there you have it. Those mysterious, translucent grains are the key to a world of delicious, homemade soda. What might have seemed like a strange science experiment is actually a simple and incredibly rewarding natural process.
As you’ve seen, getting started is all about understanding a few key principles: feeding your grains properly, using the right tools, and mastering the two-step fermentation to get that perfect fizz. The process is forgiving, and your kefir grains are surprisingly resilient, so don’t be afraid to experiment.
Once you’ve mastered this basic recipe, a whole universe of flavors opens up for you to explore with different fruits, herbs, and spices. Welcome to the satisfying, bubbly world of water kefir!

Want to learn more? Take our comprehensive waterkefir course
During this online course, food writer, fermentation expert, and author Meneer Wateetons will teach you everything you need to know about making water kefir. Water kefir is a delicious homemade fermented soft drink. Making your own water kefir is incredibly easy, refreshingly fizzy, incredibly tasty, and offers endless flavor possibilities.
WHAT ARE YOU GOING TO LEARN?
✅ What materials and ingredients do you need?
✅ What is the difference between water kefir and milk kefir? And what about that other famous SCOBY: kombucha?
✅ How much alcohol is in this DIY champagne?
✅ Learn all the cool things you can do with water kefir.
✅ Once you understand the theory, how can you endlessly experiment and vary?
✅ With the knowledge from the workshop, you’ll create entirely new and unique recipes.
🌱 Vegan-friendly
✅ Including FREE download of the powerpoint handout
✅ Online, so you can join from the comfort of your own chair.
✅ Lifetime access

 (Middel)")
About the author (Meneer Wateetons)
Meneer Wateetons (a pseudonym derived from the name of his blog, which literally means ‘Mr. what-eats-us’) is a renowned Dutch food writer, PhD scientist, teacher, fermentation expert, sausage maker, and the owner of startercultures.eu. He has written nine books on culinary topics such as fermentation, alcohol production, sausage and charcuterie making, and deep-frying. Through his books, (online) courses, and corporate trainings, he has shared his knowledge with countless hobby cooks, chefs, and food professionals. Learn more about Meneer Wateetons.


Leave A Comment